Was having a conversation this evening with an ex colleague of mine, he’s recently ventured into the world of Silverlight which he loves, for him; even though it didn’t start out that way; this has become a stepping stone to the the wonderful world of web development.
Those of you that follow my blog know that I’m leaning more and more towards MVC where possible, so I ran through a demo of what’s involved dong a simple Master Details pattern with ASP MVC3 and razor and it didn’t go down all that well, sure it worked quite well but the tooling, or lack there of, was a big let down for him. Now lets recap here, back in the 90ies when I was plodding along with php/asp and iframes (*shiver*) ASP.net was being conceived; this technology was widely accepted for a number of reasons, most people may quote the postback but another one is most definitely the tooling.
As some stage in our developer life, we’ve all watched a msdn how to video etc, and the demo objective is often remarkably and simplistically achieved, either through
- A few lines of code
- Tooling
- Some hocus pocus of some sort
 .
.
The problem is only to know what combination of the above to apply, i.e it’s too easy to be simple. Below I outline the easy and simple way of creating a master/details page with no lines of code.
Demo
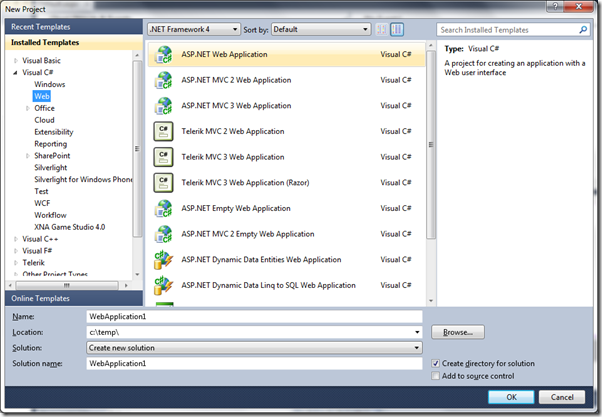
1) Open Visual Studio and create a new ASP.NET web application (I’m using .NET 4.0)
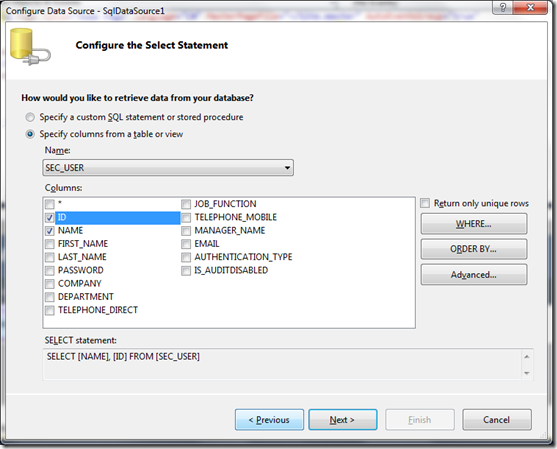
2) Drag a SqlDataSource onto the default.aspx webpage and configure it, I’ve chosen a database I’ve lying around, (note for membership please consider the the ASP.NET Membership API/Providers and associated schemas)
3) Drag a DropDownList from the toolbox and set it’s DataSourceID to be the ID you provided in the step above.
also set the DataTextField and DataTextValue to something that makes sense for your application, Here’s my generated code
<asp:DropDownList ID="lstUsers" runat="server" DataSourceID="SqlDataSourceUsers" DataTextField="NAME" DataValueField="ID" AutoPostBack="True" />
If you view your webpage now you’ll see the dropdown list populated with list of users. Now we want to populate the details part of the page, Note: I set AutoPostBack to true, this ensures that the page is posted back each time the list selection gets changed.
4) Create another datasource and set this to the details table you wish considered.
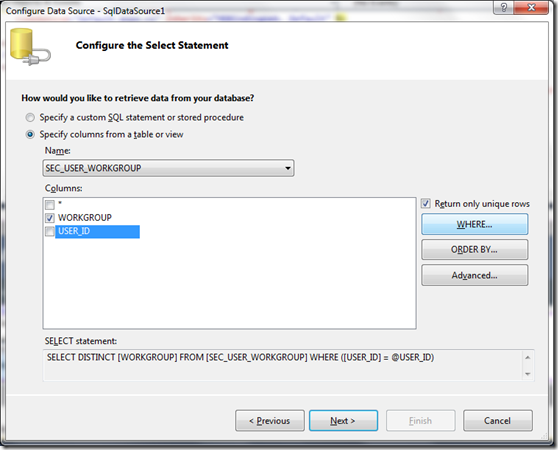
5) Add a where clause setting the restriction to the selected value of the DropDownList you just created.
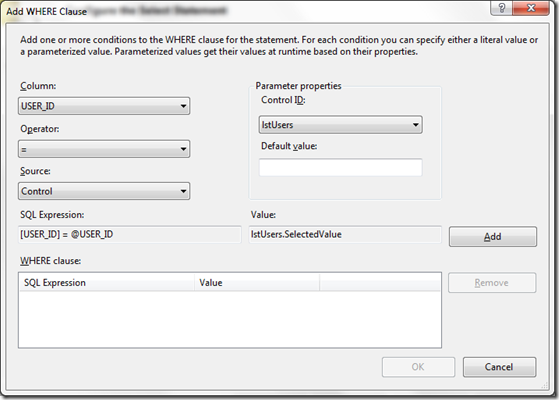
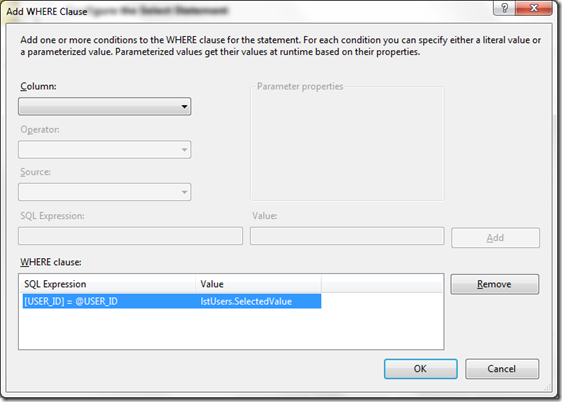
6) Now drag a GrivdView onto your page and set its datasource to the Datasource in step 5.
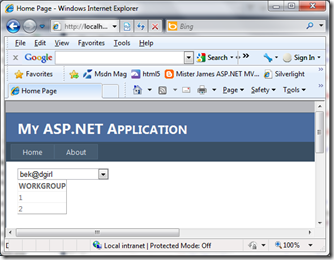
And ceca! Open your webpage in a browser now and you’ll be able to view all the workgroup id’s associated with each user.
